Looking to add a touch of drama to your garden? Look no further than elephant ear plants! These tropical foliage plants are sure to make a statement with their large, distinct leaves shaped like elephant ears.
Native to Southeast Asia, these houseplants come in various colors and patterns, including green, purple, and variegated.
Whether you have a green thumb or not, you can easily grow elephant ear plants both indoors and outdoors, depending on your climate.
From tubers of winnerscaladium hortulanum species to taro cultivars, there’s an elephant ear plant for every location and temperature.
How to Grow Elephant Ears: A Step-by-Step Guide
Growing elephant ear plants can add a touch of tropical beauty to your garden. With their large, vibrant leaves, these houseplants are sure to make a statement.
If you’re interested in growing elephant ears, follow this step-by-step guide for successful cultivation of these cultivars.
Selecting the Right Location
To ensure optimal growth of your houseplant, it’s important to choose a suitable location for your elephant ear plant. Look for an area that receives partial shade or filtered sunlight throughout the day.
This will protect the indoor plants from scorching sun rays while still providing enough light for healthy growth of their green and huge leaves.
Planting the Bulbs or Rhizomes
Once you’ve found the perfect spot, it’s time to plant your indoor plants, such as elephant ear bulbs or rhizomes.
- Prepare the soil by ensuring it is well-draining and rich in organic matter.
- Elephant ears prefer moist soil but can suffer from root rot if overwatered.
- These plants have tubers that grow underground and are known for their large green leaves.
- Dig a hole that is two times larger than the tuber or rhizome of winnerscaladium hortulanum and place it in the hole with the pointed end facing upwards.
- Cover it with soil and gently pat it down to secure it in place. If you’re planting multiple tubers, make sure to space them at least 2 feet apart to allow ample room for growth.
Watering Regularly
Proper watering is crucial when growing elephant ears with green leaves. These winnerscaladium hortulanum plants thrive in consistently moist soil but do not appreciate sitting in waterlogged conditions.
Water your elephant ear plant regularly, ensuring that the top few feet of soil remain slightly damp.
Monitor the moisture levels of your tropical plant closely and avoid overwatering as excess water can lead to root rot and other issues.
On hot summer days, you may need to water your hardy tropical plant more frequently to prevent dehydration. Remember to take a photo of your tropical plant basking in the sun to capture its beauty.
Fertilizing for Optimal Growth
To promote healthy growth and lush foliage, fertilize your elephant ear plant every 4-6 weeks during the growing season.
Choose a balanced fertilizer with equal amounts of nitrogen, phosphorus, and potassium to provide the necessary nutrients for robust growth.
Don’t forget to capture a photo of your thriving plant basking in the sun to warm your heart.
Apply the fertilizer according to the instructions on the package for your hardy plant, taking care not to exceed the recommended dosage.
Over-fertilization can result in burnt leaves or stunted growth. Remember to water your plant after applying fertilizer to help it absorb the nutrients effectively and keep its heart healthy.
By following these simple steps, you can successfully grow hardy elephant ear plants in your garden zones.
With their impressive size and striking foliage, these plants are sure to become a focal point and conversation starter among your friends and neighbors.
So go ahead and give it a try – watch as your elephant ears flourish and bring a touch of tropical paradise to your outdoor space! Check out the photo for inspiration.
Tips for Growing Elephant Ear Plants Successfully
Provide consistent moisture without waterlogging the soil.
One of the most important factors to consider when you plant elephant ears is providing them with consistent moisture.
These hardy plants thrive in moist environments, but it’s crucial not to waterlog the soil. To strike the right balance, you can follow a few simple guidelines. Check out the photo below for inspiration!
Ensure that your elephant ear plant’s feet are planted in well-draining soil. This will prevent excess water from accumulating around the roots and causing root rot.
If your garden has heavy clay soil, consider amending it with organic matter such as compost or peat moss to improve drainage.
To maintain consistent moisture levels in your plants, monitor their watering needs regularly.
During hot summer months or dry spells, you may need to water more frequently to ensure that they stay hydrated.
Conversely, during cooler periods or rainy seasons, you can reduce watering frequency accordingly.
Mulch around the base of the plant to retain moisture and suppress weeds.
Mulching is an excellent practice for promoting healthy growth in elephant ear plants. By applying a layer of mulch around the base of the plant, you can provide several benefits to the ears and feet simultaneously.
Mulch helps retain moisture in the soil for tropical plants by reducing evaporation. This is particularly beneficial during hot summer months when water tends to evaporate quickly from bare soil surfaces.
Choose organic mulch materials like wood chips or straw that break down over time and contribute nutrients back into the soil, providing a nourishing environment for tropical plants such as elephant ears.
To retain moisture, mulch also acts as a natural weed suppressant for your elephant ear plant.
It forms a barrier between sunlight and weed seeds present in the soil, preventing them from germinating and competing with your elephant ear plant for resources.
Mulch also helps protect the plant’s feet by providing a layer of insulation against extreme temperatures.
Protect from strong winds as their large leaves are prone to tearing.
Elephant ear plants, known for their large leaves, can be easily damaged by strong winds.
To safeguard your plants’ ears against tearing and potential wind damage, it’s essential to provide them with some protection for their feet.
Consider planting your elephant ear plants in a location that offers natural windbreaks for their ears, such as near a fence or building.
If this is not feasible, you can create artificial wind barriers using stakes and netting. This will help redirect the force of the wind away from the plants’ ears and reduce the risk of leaf damage.
During severe weather conditions, such as storms or hurricanes, it may be necessary to temporarily relocate potted elephant ear plants indoors or to a more sheltered area to protect their ears.
By taking these precautions, you can ensure that your plants remain healthy and vibrant despite windy conditions.
Regularly inspect for pests such as aphids or spider mites.
To keep your elephant ear plants thriving and healthy, it’s crucial to stay vigilant against common pests like aphids and spider mites.
These tiny creatures can wreak havoc on your plant’s foliage and ears if left unchecked.
Regular inspections are key to catching infestations early and preventing extensive damage to your elephant ear plants’ ears.
When inspecting your plants, pay close attention to the undersides of leaves where pests often hide.
Look for signs of small insects clustered together or webbing indicating spider mite presence. If you notice any signs of infestation, take immediate action to prevent further spread, especially if you have elephant ears.
There are several methods for controlling pest populations on elephant ear plants, including using insecticidal soap or neem oil sprays specifically formulated for garden use.
These methods can help protect the ears of the plants.
Common Problems and Pests with Elephant Ear Plants: Identification and Solutions
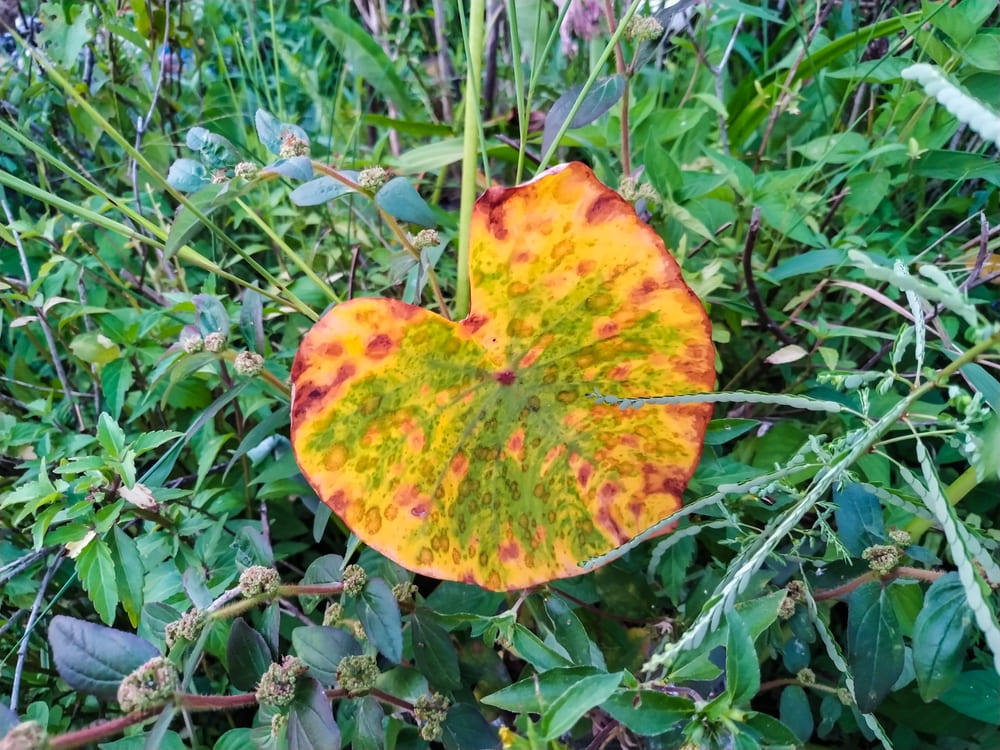
Yellowing leaves on a tropical plant may indicate overwatering or nutrient deficiencies; adjust watering or fertilize accordingly.
- If you notice yellowing leaves on your elephant ears, it could be a sign of overwatering or nutrient deficiencies.
- To address this issue, make sure to adjust the watering schedule or fertilize the plant as needed.
Overwatering is a common issue that can lead to yellowing leaves in elephant ear plants. These tropical beauties prefer moist soil but are susceptible to root rot if their roots are constantly sitting in water.
- To prevent overwatering, make sure the plant is in well-draining soil and allow the top inch of soil to dry out before watering again.
- If you notice yellowing leaves, reduce the frequency of watering and ensure proper drainage for the ears.
In addition to overwatering, nutrient deficiencies can also cause yellow leaves. Elephant ear plants require regular feeding with a balanced fertilizer to maintain healthy growth.
- If you suspect a nutrient deficiency, consider using a slow-release fertilizer specifically formulated for foliage plants.
- Apply according to the package instructions, being careful not to exceed the recommended dosage.
Brown spots on the leaves of tropical plants, such as elephant ears, could be caused by fungal diseases. It is important to remove affected leaves and, if necessary, apply fungicide.
Fungal diseases can be problematic for elephant ear plants, often causing unsightly brown spots on their leaves.
One common fungal disease that affects these plants is leaf spot, which is characterized by small brown lesions with yellow halos. To combat fungal infections:
- Start by removing any affected elephant ears leaves as soon as you notice them. This helps prevent the spread of the disease.
- Create good air circulation around your elephant ears plant by spacing them adequately apart from other plants.
- Avoid overhead watering as it can create a damp environment ideal for fungal growth, which can be detrimental to the health of elephant ears.
- Consider applying a fungicide labeled for use on ornamental plants, such as elephant ears, following the manufacturer’s instructions.
Aphids can be controlled using insecticidal soap, neem oil spray, or by manually wiping off small infestations of elephant ears.
Aphids are tiny insects that can infest elephant ear plants, sucking sap from their tender foliage and causing stunted growth. To get rid of aphids:
- For small infestations on elephant ears, manually remove the aphids by wiping them off the leaves with a damp cloth or spraying them off with a strong stream of water.
- Insecticidal soap is an effective and environmentally friendly option for controlling aphids on elephant ears. Mix according to the package instructions and spray it directly on the affected areas of the elephant ears.
- Neem oil, derived from the neem tree, is another natural remedy that can be used to control aphids on elephant ears. Dilute it with water as directed and apply it to the plant, focusing on areas where aphids are present.
Spider mites are another common pest that may affect elephant ear plants. These tiny arachnids feed on plant sap, causing yellowing leaves and webbing on the foliage. To combat spider mites:
- Regularly inspect your plants, including elephant ears, for any signs of spider mite infestation, such as fine webbing and stippled leaves.
- If you detect spider mites early on, a strong blast of water can help dislodge and control their population.
- In severe cases, consider using insecticidal soap or horticultural oil specifically formulated to target spider mites.
Repotting Elephant Ear Plants: When and How to Do It
Repotting elephant ear plants is an essential part of their care routine, ensuring their growth and vitality. Knowing when and how to repot these magnificent plants can make a significant difference in their overall health.
- Typically, it is recommended to repot elephant ear plants every 1-2 years or when they outgrow their current container.
- As these plants have vigorous growth habits, they may quickly become root-bound if not given enough space.
- By providing them with a larger pot, you allow their roots to spread comfortably and promote healthy development.
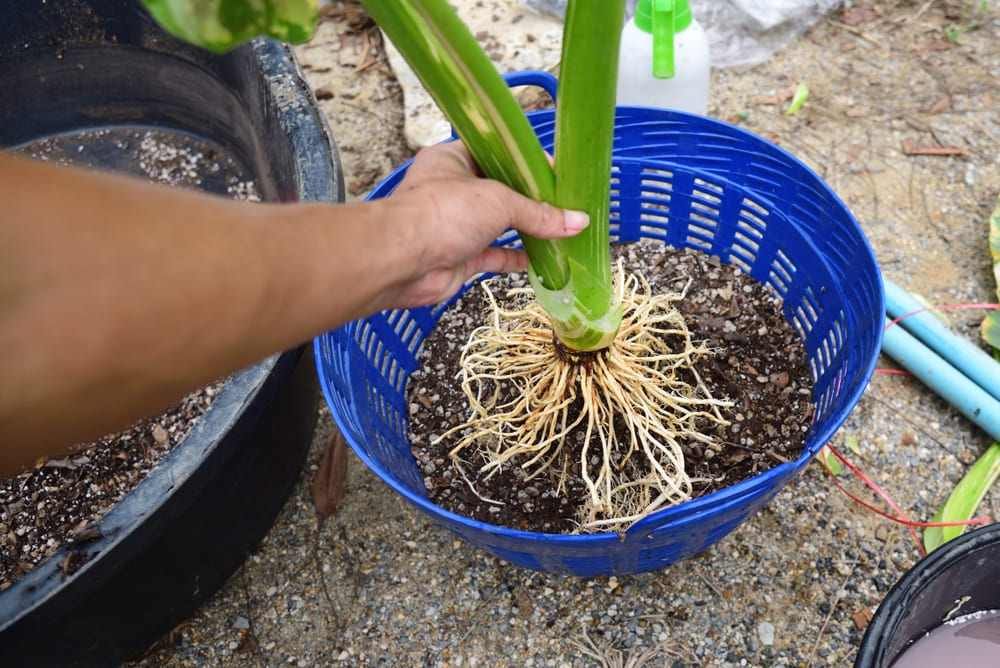
- To begin the repotting process, carefully lift the plant from its pot. Gently hold the base of the plant while supporting its leaves to avoid any damage.
- Once removed from its current container, examine the roots for any signs of overcrowding or root rot. If necessary, gently loosen tangled roots using your fingers or a small tool.
- Next, select a new pot that is one size larger than the previous one. Ensure that it has drainage holes at the bottom to prevent waterlogging.
- Fill about one-third of the new pot with fresh well-draining potting mix suitable for tropical plants.
- This mix should be rich in organic matter and provide adequate moisture retention without becoming overly soggy.
- Place the elephant ear plant into its new home, positioning it in the center of the pot.
- Gradually add more potting mix around the sides while gently pressing it down to eliminate air pockets.
- Avoid compacting it too tightly as this can hinder water drainage and restrict root growth.
- Once you have finished repotting your elephant ear plant, give it a thorough watering session.
This helps settle both the plant and soil into their new environment while providing essential moisture for optimal recovery post-repotting.
Ensure that the water reaches all parts of the pot, allowing it to drain freely through the holes at the bottom.
Best Varieties of Elephant Ear Plants for Your Garden: Alocasia vs Colocasia
If you’re looking to add a touch of tropical beauty to your garden, elephant ear plants are an excellent choice.
With their large, lush leaves and striking colors, these plants can create a stunning focal point in any landscape.
Two popular options are Alocasia and Colocasia. Let’s explore the characteristics of each variety to help you make an informed decision.
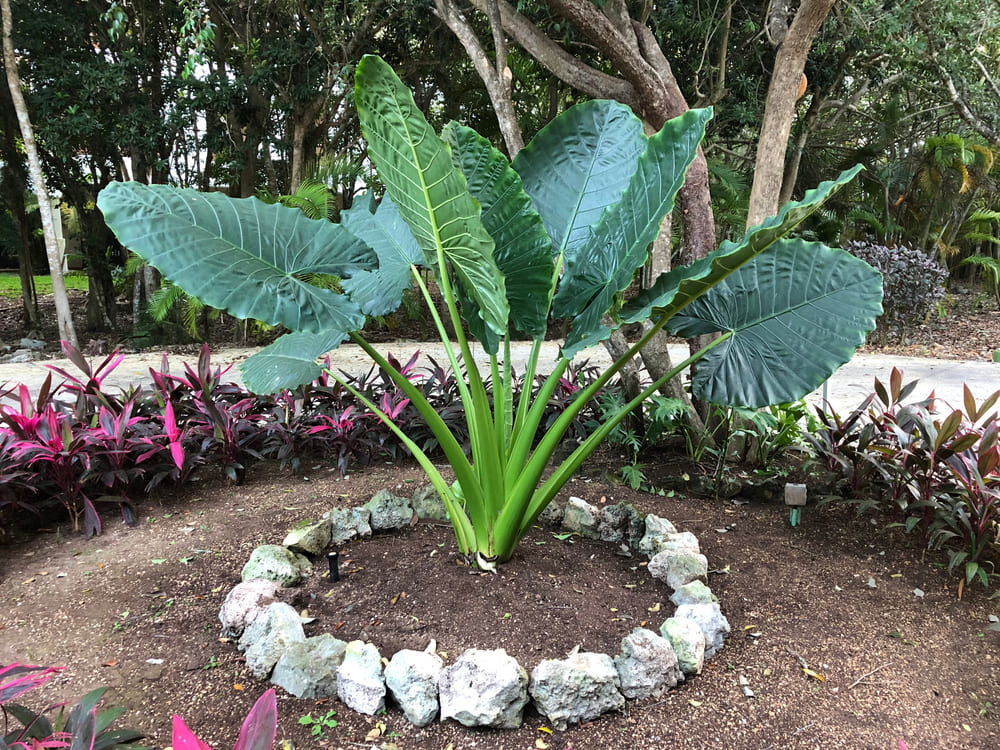
Alocasia Varieties: Upright Leaves in Vibrant Colors
Alocasia varieties are known for their more upright leaves that stand tall and proud. These plants come in a range of colors, including dark green, purple, and silver.
The contrasting hues make them visually captivating and provide an eye-catching element to your garden.
One advantage of Alocasias is their preference for bright indirect light. They thrive when placed in areas with filtered sunlight or partial shade.
This makes them ideal for gardens that receive ample sunlight but also have some shaded spots throughout the day.
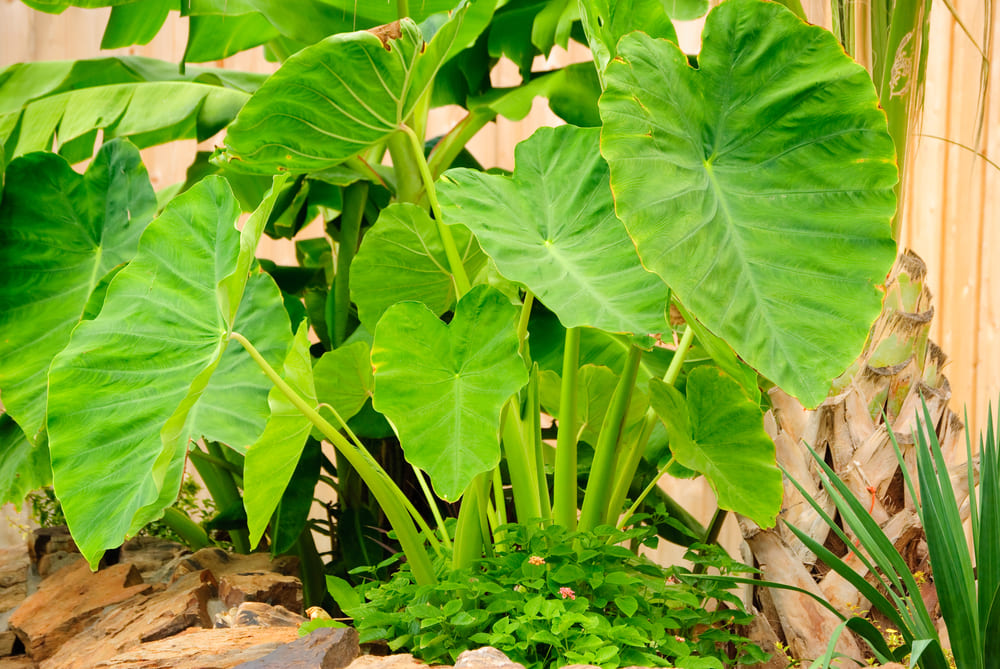
Colocasia Varieties: Heart-Shaped Leaves with Bold Shades
Colocasia varieties differ from Alocasias in terms of leaf shape and coloration. These plants boast larger heart-shaped leaves that add drama to any garden setting.
The shades available include various greens as well as striking black variations, providing a unique touch to your outdoor space.
Unlike Alocasias, Colocasias can tolerate more shade and even grow well under full shade conditions.
If you have areas in your garden that receive less direct sunlight or have dense foliage overhead, Colocasias can be an excellent choice.
Consider Size and Growth Habits
When selecting between Alocasia and Colocasia varieties, it’s crucial to consider the size and growth habit of each plant.
Some cultivars of both varieties can grow quite large, reaching heights of several feet. Others may stay more compact, making them suitable for smaller gardens or container planting.
If you have limited space, Alocasia ‘Polly’ or Colocasia esculenta ‘Black Magic’ are great options.
These varieties offer the same stunning foliage but in a more compact form. On the other hand, if you have ample space and want to make a bold statement, consider Alocasia macrorrhizos or Colocasia gigantea, which can reach impressive sizes.
Enhancing Your Garden Design with Elephant Ear Plants: Ideas and Combinations
Creating a stunning garden design can be an exciting endeavor, and one plant that can truly elevate your outdoor space is the elephant ear plant. With its large, striking leaves and tropical vibes, this plant is sure to make a statement in any garden.
Pairing with Lush Foliage Plants
To create a lush tropical oasis in your garden, consider pairing elephant ear plants with other foliage plants like ferns or palms.
The combination of their vibrant green colors and different leaf shapes will add depth and texture to your garden beds or containers.
Place the elephant ears as a backdrop, allowing their large leaves to provide the perfect canvas for showcasing smaller flowering plants in front.
Adding Texture and Visual Interest
For an eye-catching display, mix different varieties of elephant ear plants together.
Combining varieties such as Alocasia macrorrhiza with its enormous heart-shaped leaves and Colocasia esculenta ‘Black Magic’ with its dark purple foliage will create a visually interesting arrangement.
This mix of textures and colors will undoubtedly become a focal point in your garden.
Incorporating into Water Features
If you have a water feature or pond in your garden, don’t miss the opportunity to incorporate elephant ear plants for a stunning reflection effect.
Plant them around the edges of the water feature, allowing their leaves to gracefully drape over the surface.
As they catch the sunlight and mirror themselves on the water’s surface, you’ll be amazed by the magical ambiance they create.
Thriving Indoors as Houseplants
Elephant ear plants are not limited to outdoor gardens; they also make excellent houseplants. If you live in colder climates or simply want to enjoy these majestic beauties indoors, place them near windowsills where they can receive partial shade.
Ensure proper drainage by using a container with holes and well-draining soil. With their impressive size and unique foliage, elephant ear plants will instantly transform any indoor space into a tropical paradise.
Conclusion: The Beauty and Care of Elephant Ear Plants
The elephant ear plant is a stunning addition to any garden or indoor space. With its large, vibrant leaves and unique shape, it adds a touch of tropical beauty wherever it is planted.
Growing elephant ear plants can be a rewarding experience. By following a step-by-step guide like the one provided, you can ensure that your plants thrive and flourish.
Remember to provide them with the right amount of sunlight, water, and nutrients for optimal growth.
To successfully grow elephant ear plants, keep in mind these helpful tips: choose the right variety for your climate and space, provide adequate drainage for their pots or beds, and protect them from extreme temperatures or harsh weather conditions.
It’s important to be aware of common problems and pests that may affect your elephant ear plants. Identifying these issues early on will allow you to take appropriate measures to prevent damage.
Solutions such as proper watering techniques and organic pest control methods can help maintain healthy plants.
Knowing when and how to repot your elephant ear plants is crucial for their overall well-being. Keep an eye out for signs that indicate they have outgrown their current container.
Repotting at the right time using suitable soil mixtures will promote healthy root growth and ensure continued vitality.
When selecting varieties of elephant ear plants for your garden, consider the differences between Alocasia and Colocasia species.
Each has its own unique characteristics that can enhance your garden design in different ways. Choose the variety that best suits your aesthetic preferences and growing conditions.
Lastly, let your creativity flow by exploring various combinations with other plants in your garden design.
Elephant ear plants work well as focal points or as part of lush green backgrounds. Experiment with different arrangements to create stunning visual displays.
Incorporating elephant ear plants into your garden not only adds beauty but also provides an opportunity to showcase your gardening skills while enjoying nature’s wonders up close.
So, go ahead and bring the exotic charm of elephant ear plants into your outdoor or indoor space.
FAQs
Q: How often should I water my elephant ear plant?
A: Elephant ear plants prefer consistently moist soil, so it’s important to water them regularly. Aim to keep the soil evenly moist but not waterlogged. Check the moisture level by sticking your finger about an inch into the soil – if it feels dry, it’s time to water.
Q: Can I grow elephant ear plants indoors?
A: Yes, you can grow elephant ear plants indoors as long as they receive adequate light and humidity. Place them near a bright window or provide artificial lighting if needed. Misting their leaves regularly can help create a humid environment.
Q: Are elephant ear plants toxic to pets?
A: Yes, elephant ear plants are toxic to pets if ingested. It’s important to keep them out of reach of curious animals. If you suspect your pet has consumed any part of the plant, contact a veterinarian immediately.
Q: Do elephant ear plants require fertilizer?
A: Yes, fertilizing your elephant ear plants can promote healthy growth and vibrant foliage. Use a balanced, slow-release fertilizer during the growing season according to package instructions. Avoid over-fertilization as it may lead to burnt leaves or stunted growth.
Q: How do I propagate my elephant ear plant?
A: Elephant ear plants can be propagated through division or by collecting and planting their seeds. To divide the plant, carefully separate offsets from the main clump and replant them in individual pots or beds with well-draining soil.
